manual 3D prinTING
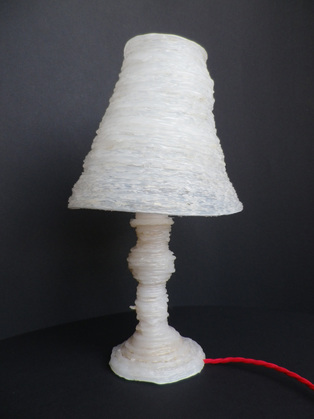
We debuted our human 3D Printing technique at La Ricascente at the Milan Design Festival. Using a process devised in the classrooms of Skinners' School in Hackney we created a working table lamp in three hours - faster (though less accurate) than a 3D printer would manage.
The process mimics extrusion 3D printers as we build up layer up layer of plastic into a shape supported by a sand bed.
The process mimics extrusion 3D printers as we build up layer up layer of plastic into a shape supported by a sand bed.
TRY IT YOURSELF
Alongside ploughing new ground in the 3D Print world, at 3DPrintLab.org we have been busy helping the next generation get ahead and learn how 3D printing works by running education workshops with the fantastic Skinners' Academy, a local school for 11-18 year olds.
With politicians getting all excited about the jobs potential micro-manufacturing could offer, and with 3D printers now standard kit in Universities and Design companies it's looking like it'll be an essential skill in years to come. The cost of printers is out of the reach of many people so we've devised some simple exercises to help people better understand the technology before doing the real thing.
The project takes things back to basics by getting students to think like a printer, deconstructing real objects into digital scans, before reconstructing them to make 3D-printed glue gun sculptures.
The resources below are provided for your use and enjoyment but they are far from perfect! Please share your improvements and innovations with us and others.
CUT AND PASTE ME
Workshop 1 - Manual 3D Printing
3D Printers can print out real 3D objects like cups, tools and even food. They work just like a normal printer but instead of printing ink they print out layers of plastic or metal on top of each other to create a solid object.
In this workshop we'll be pretending to be 3D Printers to create a layered glue sculpture in the form of an object of your choosing.
STEP _1
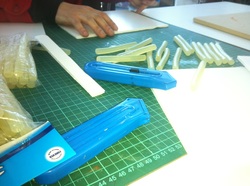
Collect the following materials;
Glue gun
100 glue sticks
Play sand 15kg
Tray for sand
Ruler
Foam board (cut to ~15mm strips)
Craft knife
Cutting board
A3 sheet of paper
An object you will copy
Glue gun
100 glue sticks
Play sand 15kg
Tray for sand
Ruler
Foam board (cut to ~15mm strips)
Craft knife
Cutting board
A3 sheet of paper
An object you will copy
STEP _2
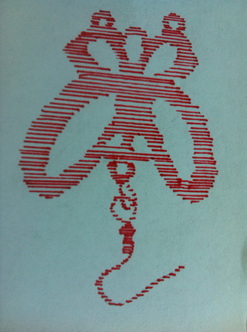
Choose an object which you will replicate. In the past we've tried earrings, ice creams, peppers and table lamps.
Measure the object with a ruler and sketch its outline on some paper. This will be used to help you replicate its shape with glue.
Draw parallel lines across the outline every 2mm to show how the object wil be built up in layers. This will be used as your guide when making the sculpture.
Patience warning: Even small objects like the ice cream we produced can take several hours to make. Make sure you'll got some time on your hands before you start the workshop.
STEP_3
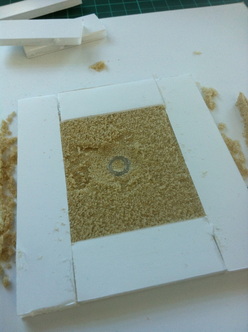
Starting on a sheet of paper (to provide a base), build up each layer of the object with glue being careful not to burn yourself. For each layer you will need to follow the same process:
a) making a frame with the foam board,
b) building a layer of glue with the glue gun,
c) filling the layer with sand and finally,
d) levelling the sand using a ruler or straight edge to expose the top of the last layer before starting again.
There is quite a lot of skill in judging the size of the layer and in knowing when to move to a new layer so take your time. This shouldn't be a problem as you can expect to spend a lot of time watching the glue dry!
STEP_4
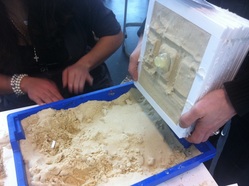
Once you've built up all the layers its time to reveal your object. Turn the sand bed upside down so all the sand comes out.n
STEP_5
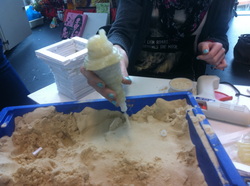
If your object is hollow you'll need to give it a shake and usually a run under the tap to remove all of the sand.
The sand can be reused to make another object so don't throw it away.
The sand can be reused to make another object so don't throw it away.
STEP_6
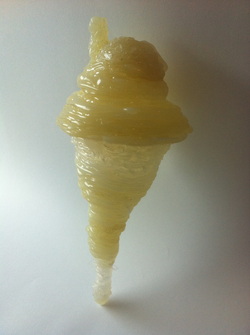
You're nearly finished. Put your beautiful 'printed' object on display. Admire the layers and have fun seeing where you've gone wrong. It's not as easy as it looks. We've created some pretty weird and interesting shapes by getting our dimensions wrong!
How would a 3D Printer do it differently? How could you make the object more detailed? How could you speed the process up?
Post a picture of your object and suggestions of how to improve this workshop by joining the 3D_PrintLab community at www.3Dprintlab.ning.com.
We hope you enjoyed the workshop.
How would a 3D Printer do it differently? How could you make the object more detailed? How could you speed the process up?
Post a picture of your object and suggestions of how to improve this workshop by joining the 3D_PrintLab community at www.3Dprintlab.ning.com.
We hope you enjoyed the workshop.
